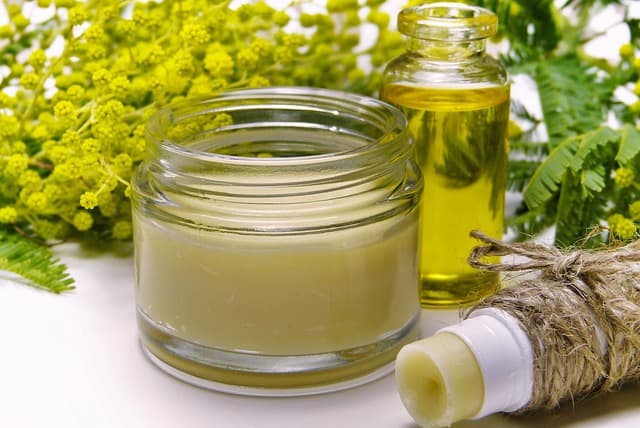
Nowadays, more and more people are getting hooked on natural and DIY beauty treatments, and one of the front-runners in this trend is the “oil cleanser”. If you’re wondering how to make oil cleanser, then you’re in for a treat!
To make oil cleanser at home, combine a carrier oil (like jojoba or sweet almond) and a secondary oil (like castor) in a 3:1 ratio. Mix in a glass bottle, shake well, and use it to gently cleanse your face.
This article provides a step-by-step, comprehensive guide on creating your very own oil cleanser at home, packed with tips, tricks, and key insights into this transformative beauty regime.
Understanding the Science of Oil Cleansing
What is Oil Cleansing?
You might ask, “What on Earth is oil cleansing?”
Oil cleansing is an ancient skincare technique that employs natural oils to cleanse the skin and balance its natural oil production. The core principle behind it is ‘like dissolves like’.
This implies that oil can dissolve other oil-based substances, including excess sebum, makeup, and environmental pollutants clinging to your skin.
Benefits of Oil Cleansing
Oil cleansing is not just a fad; it’s based on solid science. By using a specially selected blend of natural oils, oil cleansing can:
- Gently cleanse the skin without stripping it of its natural oils
- Balance oil production in both oily and dry skin types
- Promote clear skin by unclogging pores
- Boost skin hydration and elasticity
- Nourish the skin with vitamins and antioxidants from the oils
How to Choose the Right Oils for Your Oil Cleanser
Understanding Different Types of Oils
Before we dive into how to make oil cleanser, it’s crucial to understand that not all oils are created equal.
Some oils are better suited for certain skin types due to their unique composition.
For instance, jojoba oil is excellent for oily skin, while avocado oil is ideal for dry skin.
Creating a Custom Blend for Your Skin Type
To make the perfect oil cleanser that caters to your unique skin needs, you’ll need to combine a “carrier oil” with a “secondary oil”.
Carrier oils like jojoba, sweet almond, or grapeseed are light and easily absorbed by the skin.
Secondary oils like castor or neem oil have potent cleansing properties but can be too strong to be used alone, hence they are mixed with carrier oils.
The Step-by-Step Guide on How to Make Oil Cleanser
So, you’ve understood the concept of oil cleansing, and you’ve chosen your oils.
Now it’s time for the fun part – creating your oil cleanser!
Gather Your Ingredients and Materials
To create your own oil cleanser, you’ll need:
- Your chosen carrier oil: For example, if you have oily skin, jojoba oil is an excellent choice due to its similarity to our skin’s natural oils. For dry skin, you may consider sweet almond oil, known for its hydrating properties.
- Your chosen secondary oil: Castor oil is often the go-to secondary oil due to its potent cleansing properties. For acne-prone skin, consider neem oil for its antibacterial properties.
- A clean, dry glass bottle with a tight lid: A dark-colored bottle can help protect your oil blend from light degradation.
- A small funnel: This isn’t strictly necessary, but it makes the pouring process a whole lot tidier!
The Mixing Process
The general rule of thumb for making an oil cleanser is to mix ¾ of carrier oil with ¼ of secondary oil.
However, this can be adjusted based on your skin’s needs.
Here’s the simple process:
- Using your funnel, pour your chosen carrier oil (let’s say jojoba oil) into the glass bottle until it’s three-quarters full.
- Next, pour in your secondary oil (in this case, castor oil), filling up the remaining one-quarter of the bottle.
- Close the lid tightly and shake well until the oils are thoroughly combined.
Your homemade oil cleanser is now ready for use!
Remember, this is a personalized skin care product, tailor-made for your skin type.
Feel free to experiment with different oil combinations to see what works best for you.
How to Use Your Homemade Oil Cleanser
Learning how to make oil cleanser is one thing, but knowing how to use it properly is another.
The oil cleansing method is a gentle, effective way to dissolve away the day’s impurities, and here’s how to do it:
- Prepare: Start with dry hands and a dry face. Pour a nickel to quarter-sized amount of your oil cleanser into your palm.
- Warm up the oil: Rub your hands together to warm the oil, this helps it spread more evenly on your skin.
- Massage: Gently massage the oil into your face in circular motions for a minute or two. This isn’t just to spread the oil; it’s also an opportunity to relax, stimulate circulation, and allow the oil to penetrate and bind with the impurities.
- Wipe off: Soak a soft washcloth in warm water and wring it out so that it’s damp but not dripping. Gently wipe off the oil from your face. The warmth helps open up the pores, allowing for a deeper cleanse.
Remember to be gentle during the entire process.
Harsh scrubbing is not necessary with oil cleansing.
The oil does the job of breaking down dirt and impurities, and the warm washcloth assists in gently wiping them away.
Frequently Asked Questions (FAQs)
- Can I use any oil to make an oil cleanser?
While many oils have beneficial properties for the skin, it’s crucial to select oils based on your skin type and needs.
- How often should I use my oil cleanser?
For most people, oil cleansing once a day, preferably at night, is sufficient.
- Can oil cleansers remove makeup?
Yes, one of the benefits of oil cleansers is their ability to dissolve makeup, even stubborn, waterproof ones.
- Are there any side effects to oil cleansing?
Generally, oil cleansing is safe. However, if you’re new to it, start slowly and monitor your skin’s reaction. Always patch-test new oils before using them on your face.
- How long can I store my oil cleanser?
Oil cleansers can usually be stored for up to six months in a cool, dark place.
- Can I add essential oils to my oil cleanser?
Yes, but use them sparingly, and always dilute them with a carrier oil. Some essential oils may not be suitable for sensitive skin.
Conclusion
Mastering how to make oil cleanser can seem daunting at first, but with a little patience and the right knowledge, anyone can do it!
It’s a powerful, customizable, and cost-effective addition to your skincare regimen that can provide numerous benefits.
So, get your oils ready, and start your DIY skincare journey today!
Sources
- Healthline: Oil Cleansing: What It Is and Which Oils to Use
- Medical News Today: Does the oil cleansing method work?
I’m Thomas, the owner of SustainableWave. Passionately promoting a sustainable planet. With experience in various eco-roles, I’ll share green tips, sustainability hacks, and personal eco-journeys on my blog.